I’ve recently purchased a RF LED strip controller, and it came with a remote. I thought it’d be interesting to see if I could use my SDRs to capture the signal and emulate it.
The remote
The remote is a marvel of cost engineering. It operates around 434MHz. One side has a 3 by 7 array of pads for rubber dome buttons (molded into the top plastic on the remote), and the other side has the circuitry for the radio.
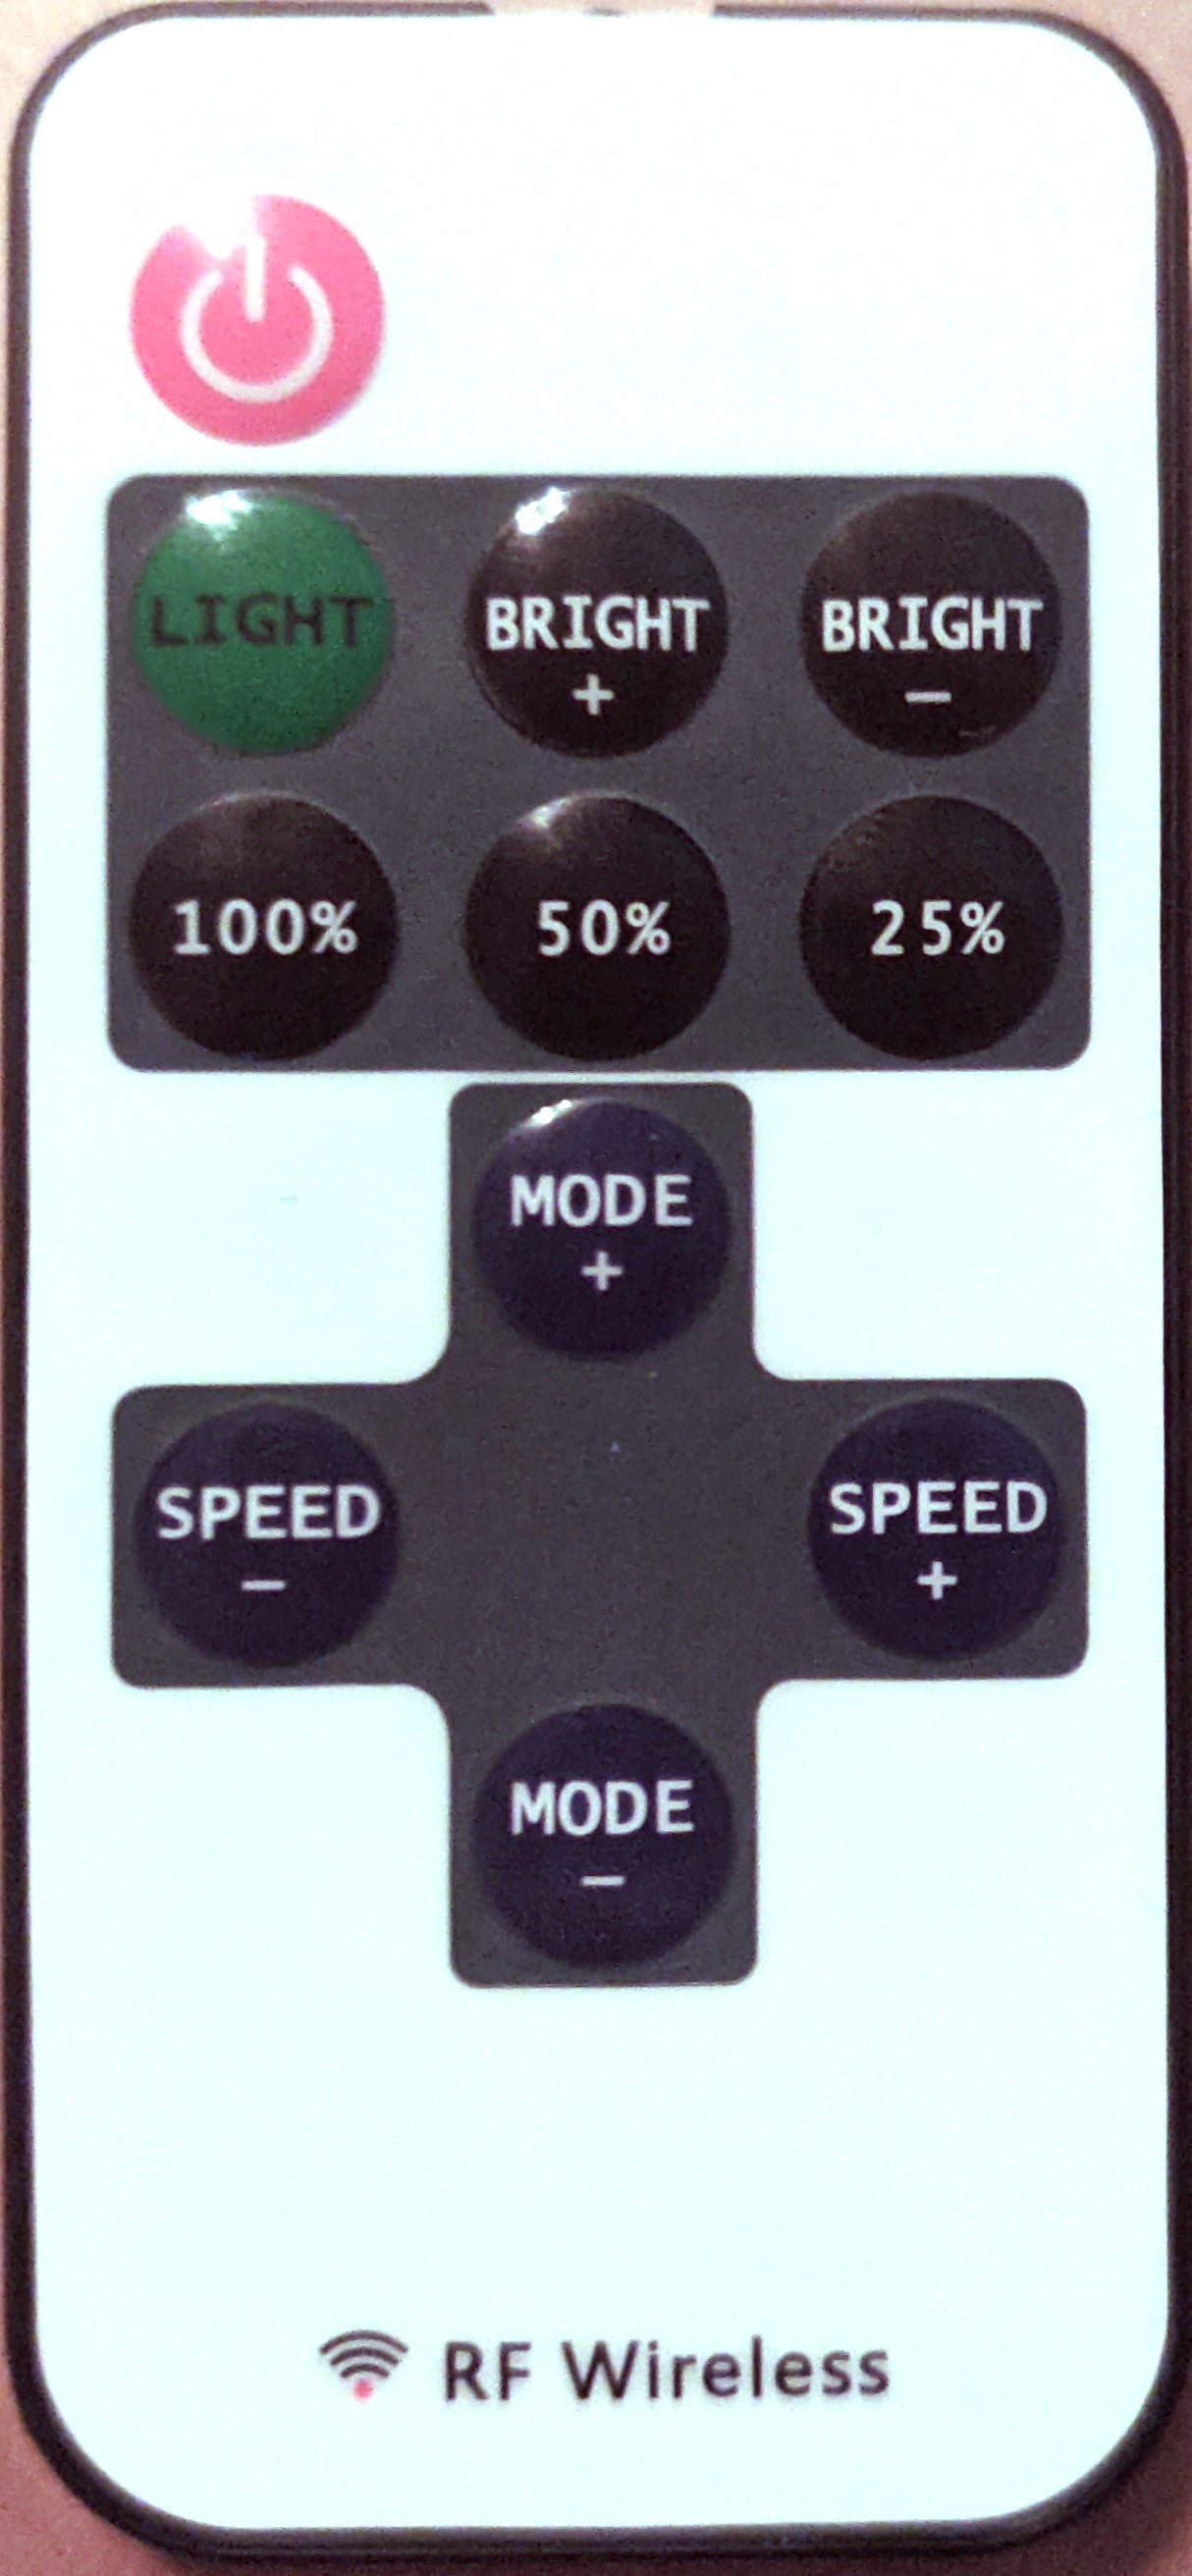
This circuit is clearly used for more than just this specific remote. The button array is designed to allow for different labels to be glued on top for different applications.
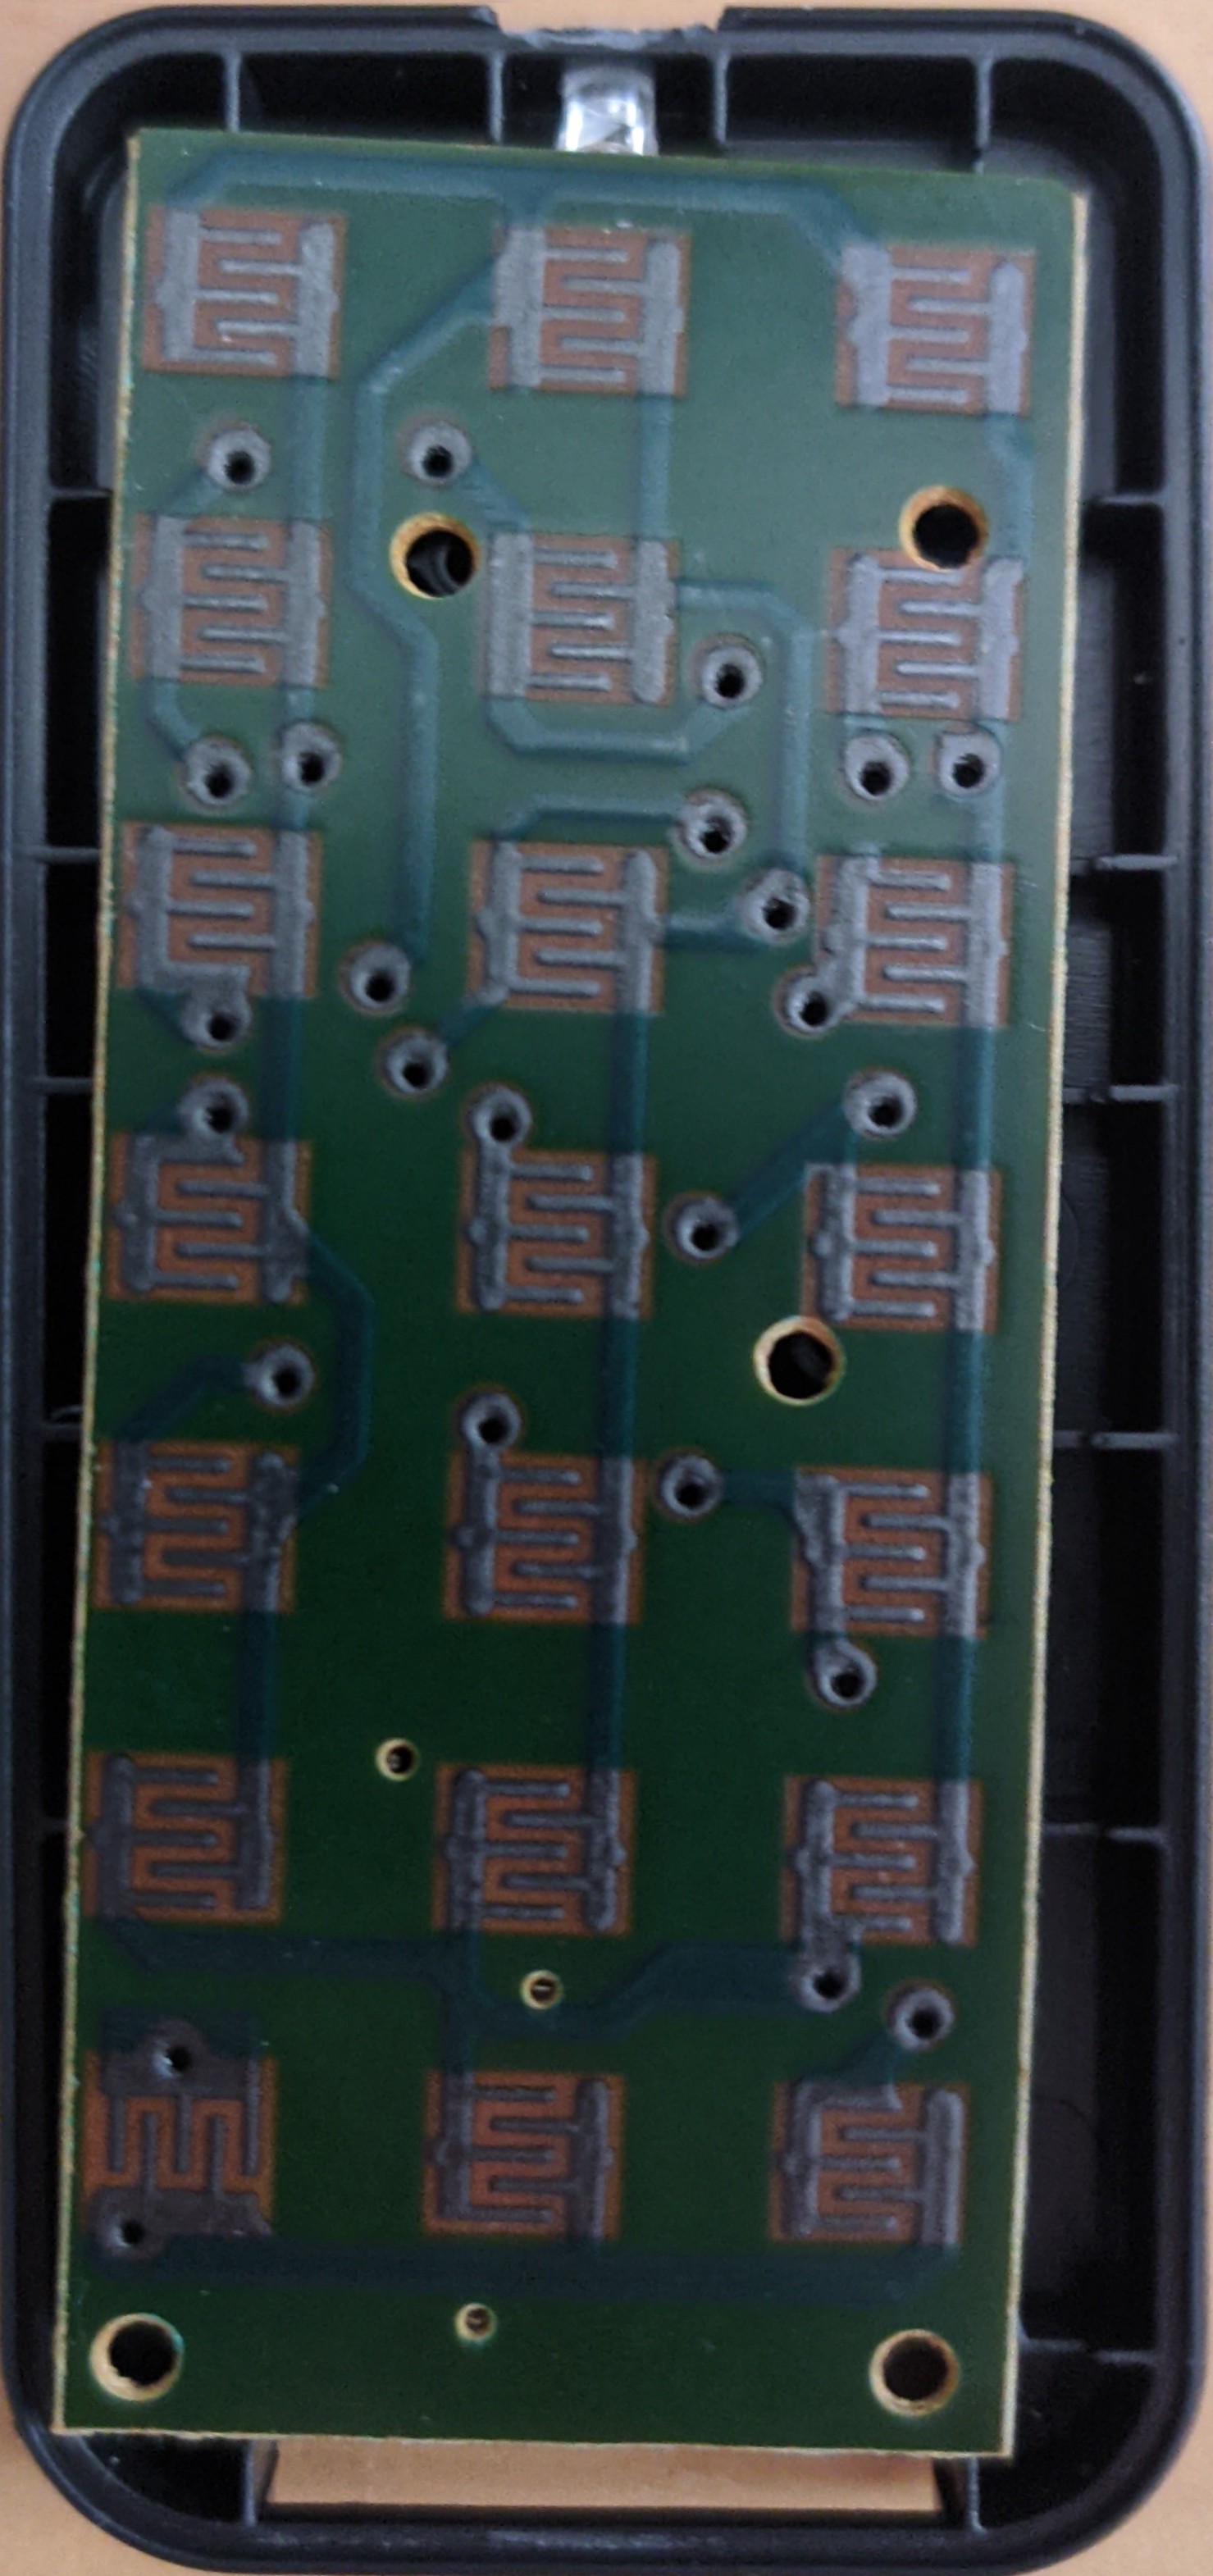
“WSH21-RF-1” is printed into the copper on PCB, and there is a crystal marked “R433”. The IC is a 14-pin SOIC and is black-topped so that nothing can be read, but I suspect it is a microcontroller, since it needs to decode the button presses and repeatedly send them to the radio transmitter. The transistors that drive the radio are both SOT-23 packages. The left transistor is marked “R25.” and the right is marked “1AM”. The antenna wraps around the left and bottom of the board.
The whole thing is powered by a single CR2032 coin cell.

Tools
There’s only one tool really needed, an SDR with receive and transmit capabilities. However, a separate receiving SDR is also useful for viewing the signal and making sure that everything is working right.
For me, this meant:
- HackRF One
- RTL-SDR
- 2 telescoping antennas, extended to \(\textrm{c} / 433\textrm{MHz} / 4 = 17.3\textrm{cm}\)
And for software, I made use of:
- SDRangel to view the signals
- Universal Radio Hacker to capture, interpret, and retransmit the signals. This is a really cool piece of software, but for this, we’ll only be touching the tip of the iceberg.
Procedure
Viewing the remote’s signal
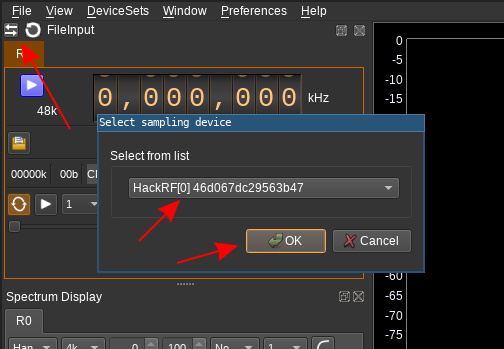
Open up SDRangel, and change the input to the HackRF One. The HackRF One is pref over the RTL-SDR due to its greater bandwidth, which makes it easier to find the signal since it is unlikely that the remote outputs exactly on 433MHz.
Then it’s time to tune the SDR to 433MHz, and see what happens when a button is pressed:
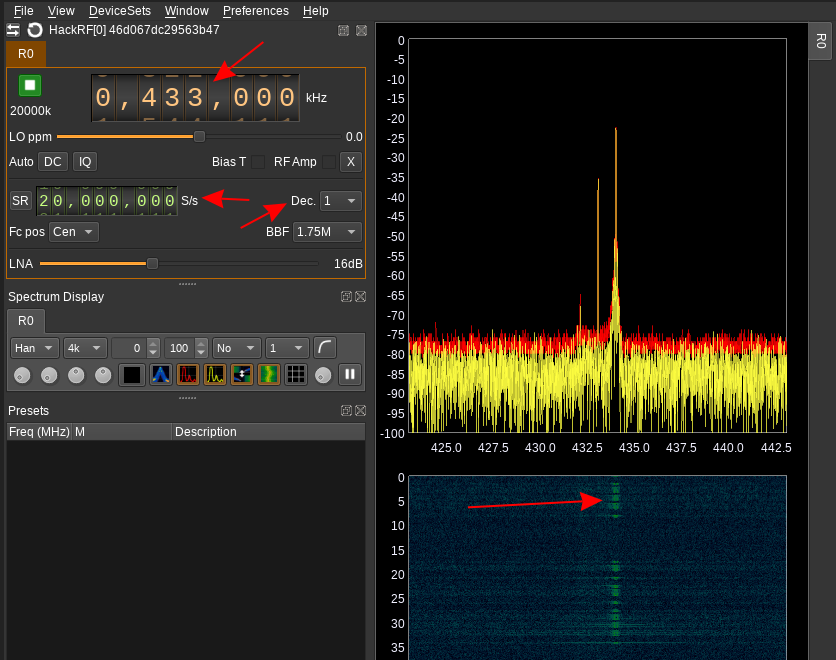
It looks like our signal is more around 434MHz.
Capturing the signal
Anyway, it’s time to capture that signal. Let’s close SDRangel, and open up Universal Radio Hacker. And as it suggests, we should jump straight to recording:
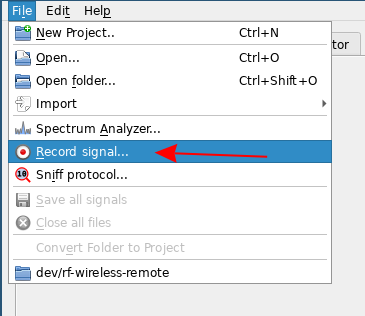
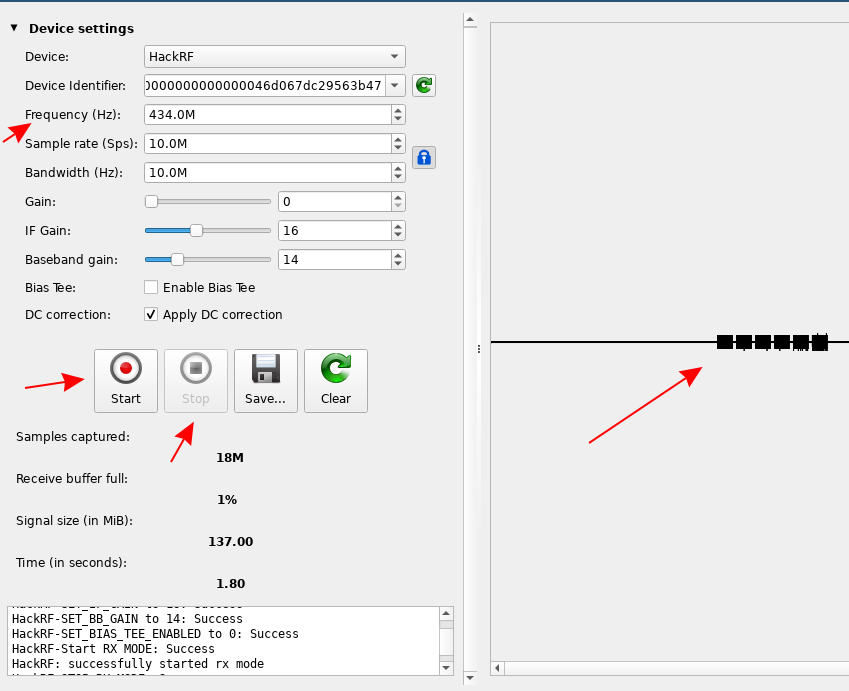
Record the data using the frequency determined before. Save this data once it is recorded.
Interpreting the signal
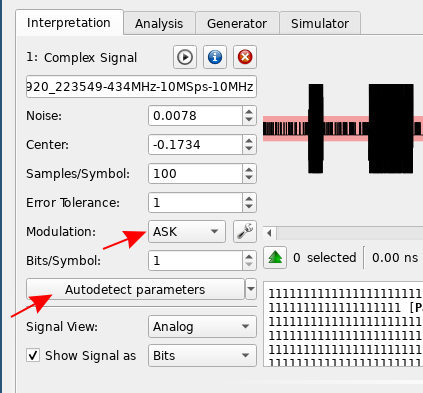
Once the data is open in URH, view the waveform. The way that it uses on/off state to transmit data is known is on/off keying, which is a specific form of amplitude shift keying or ASK.

Tell URH that this is ASK, and click the “Autodetect Parameters” button to automatically figure out how to read this data.
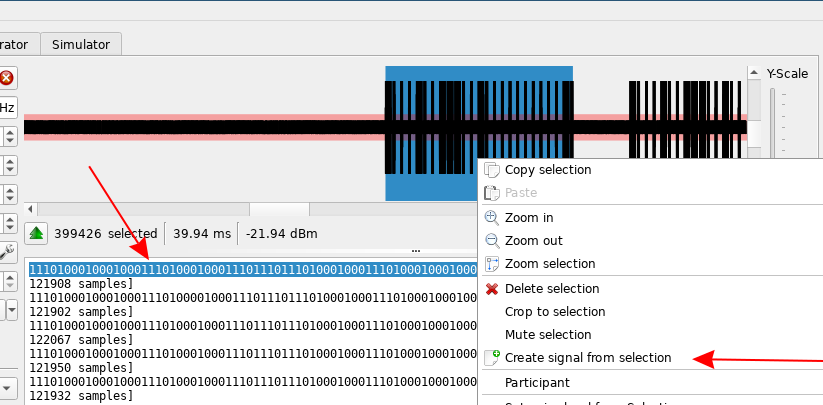
Select one of the transmitted signals in the text pane, and then right click in the wave pane and save that signal as its own file. Having the signal in its own file will come in handy later.
Make sure that the new signal has the exact same parameters as the original signal, and rename it to something more readable.
Generating a new signal
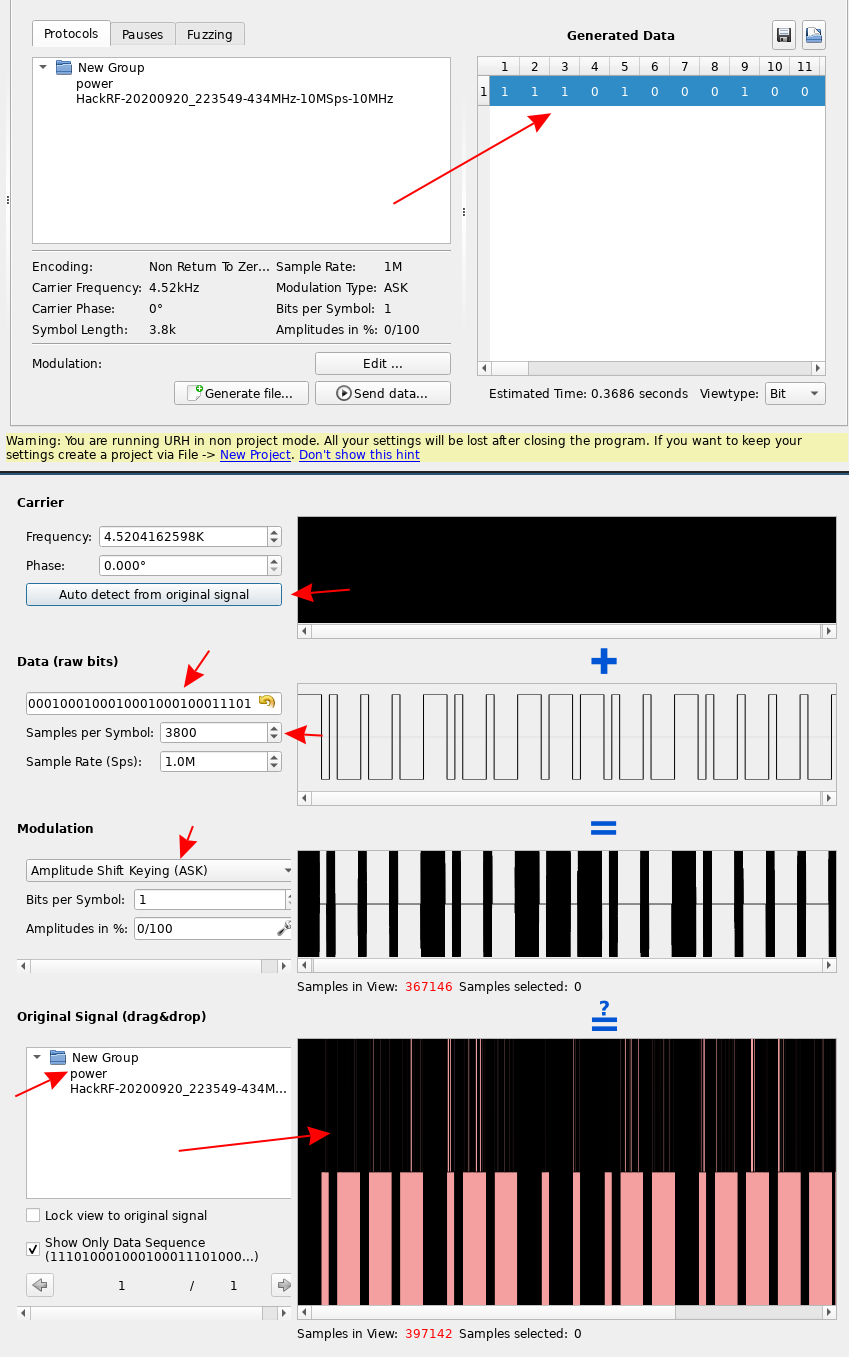
Switch to the “Generate” tab and drag the newly created signal into the “Generated Data” pane. Click on “Edit…” to begin changing the parameters that we’ll be using to transmit the message.

Select all the bits in the “Generated Data”, copy them, and paste them into the “Data (raw bits)” field on the “Edit…” screen. Make sure that:
- the “Samples per Symbol” value is the same as the “Samples per Symbol” value in the “Interpretation” tab,
- the signal generated is ASK,
- and the Sample Rate is the same as the sample rate used to record the data
Drag the trimmed signal from the “Original Signal” pane into the waveform viewer on the left, and click on the “Auto detect from original signal” button in the “Carrier” area. Make sure that the generated and the original signal match.
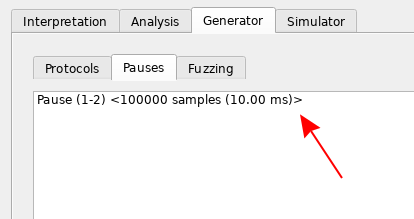
Make sure that there’s a pause of an appropriate length between signal repetitions.
Make sure all the parameters are correct, and start transmission! If you’ve done everything right, the receiver should get the signal and do whatever it is supposed to do.
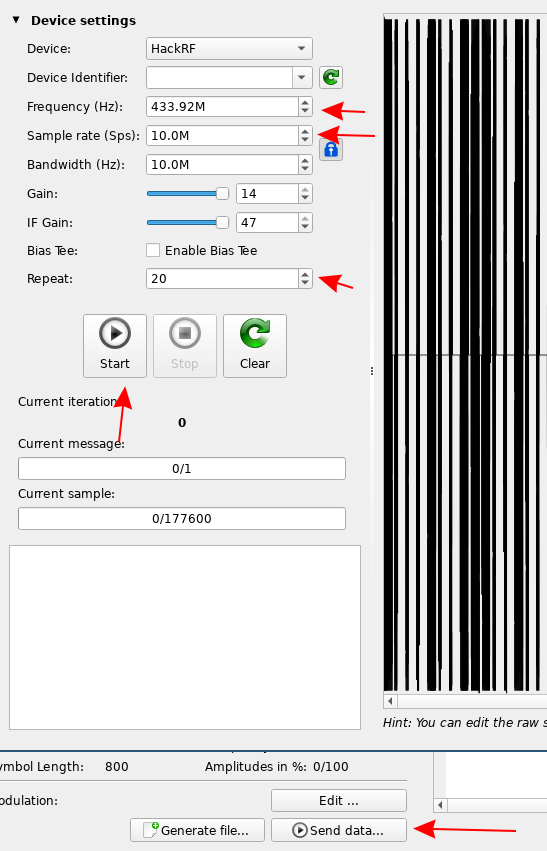
You may wish to have SDRangel open and listening using another SDR. This is very helpful for debugging, since it’s possible to compare the relative power and frequencies of the SDR transmission with the remote’s transmission.